How to Drill Holes in Glass Bottles for Arts & Crafts
Share
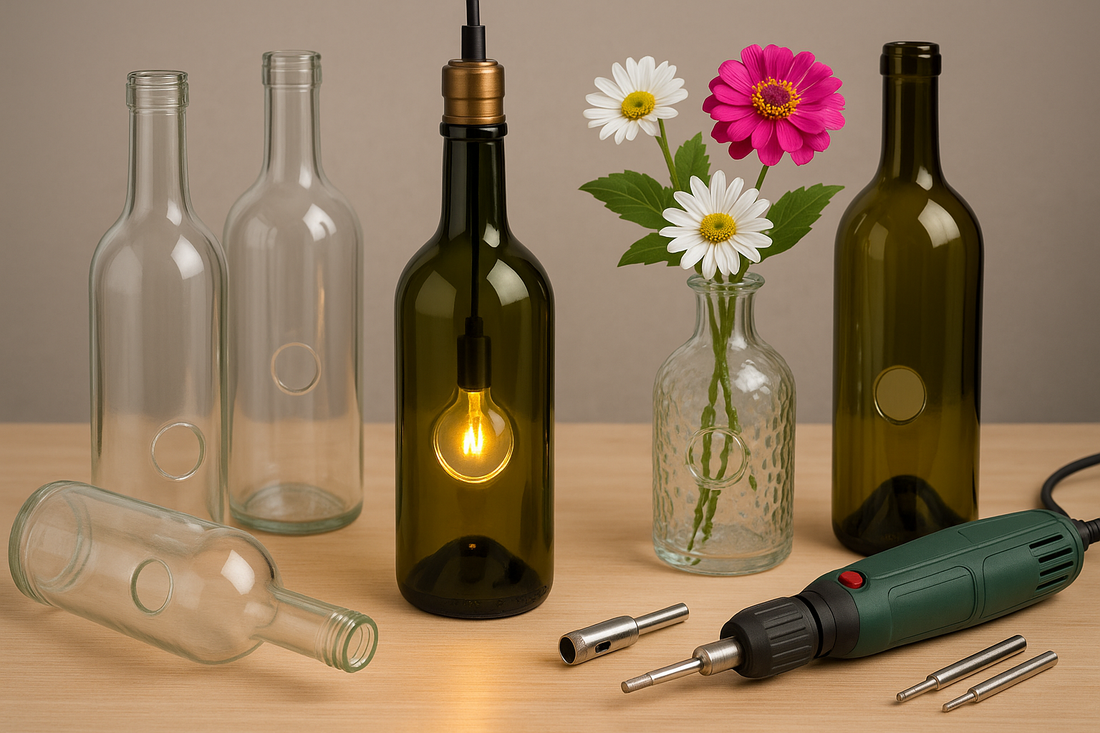
Glass bottle projects are a fantastic way to turn ordinary objects into unique art. Whether you’re making a bottle lamp, a vase, or just a decorative piece, the first step is often drilling a hole. This can seem daunting, but with the right tools, it's a simple process.
This guide will walk you through how to use Drilax diamond hole saws to safely and easily drill holes in glass bottles, helping you create stunning bottle lamps and other crafts without the fear of cracking the glass.
Why a Diamond Hole Saw is Essential for Glass
A regular drill bit will only crack or shatter a glass bottle. The key is to use a diamond hole saw, which is specifically designed to grind through hard, brittle materials like glass without causing stress. The diamond abrasive on the tip of the saw slowly and smoothly removes material, creating a clean, perfect circle.
Introducing the Drilax Diamond Hole Saw Chrome Series
For glass drilling projects, we highly recommend our Drilax Chrome Series diamond hole saws. These tools are engineered for precision and are perfect for hobbyists and professionals alike.
We also offer specialized sets that include an insert guide. This guide is an absolute game-changer for beginners. It secures the hole saw in place at the start of the cut, preventing it from "walking" and ensuring your hole is exactly where you want it.
Step-by-Step Guide to Drilling a Glass Bottle
-
Prepare Your Work Area: Find a stable surface and place the bottle on a soft, non-slip mat. You'll be using water, so work in an area that can get wet.
-
Use a Drill Guide: If your set includes an insert guide, secure it to the bottle with a clamp or by hand. This will hold the drill saw in place for a perfect start.
-
Use Water Lubrication: This is the most crucial step. Water serves two purposes: it keeps the drill bit cool, and it lubricates the cutting area to prevent dust and chipping. You can use a spray bottle or a small stream of water.
-
Start Slowly: Begin drilling at a slow speed, applying very light pressure. Once the saw has created a shallow groove, you can increase the speed slightly and remove the guide.
-
Let the Saw Do the Work: Continue drilling with light, consistent pressure. Avoid pushing too hard. Let the diamond abrasive grind through the glass.
-
Drill All the Way Through: Keep a constant flow of water on the cutting area until you break through to the other side. You'll know you're close when the sound of the drilling changes and the hole saw starts to move more freely.
By following these simple steps, you'll be able to confidently drill holes in glass bottles for beautiful bottle lamps, custom vases, and any other glass-based craft projects you can imagine.